Five Different Ways to Make Book Binding Fun Fold Cards
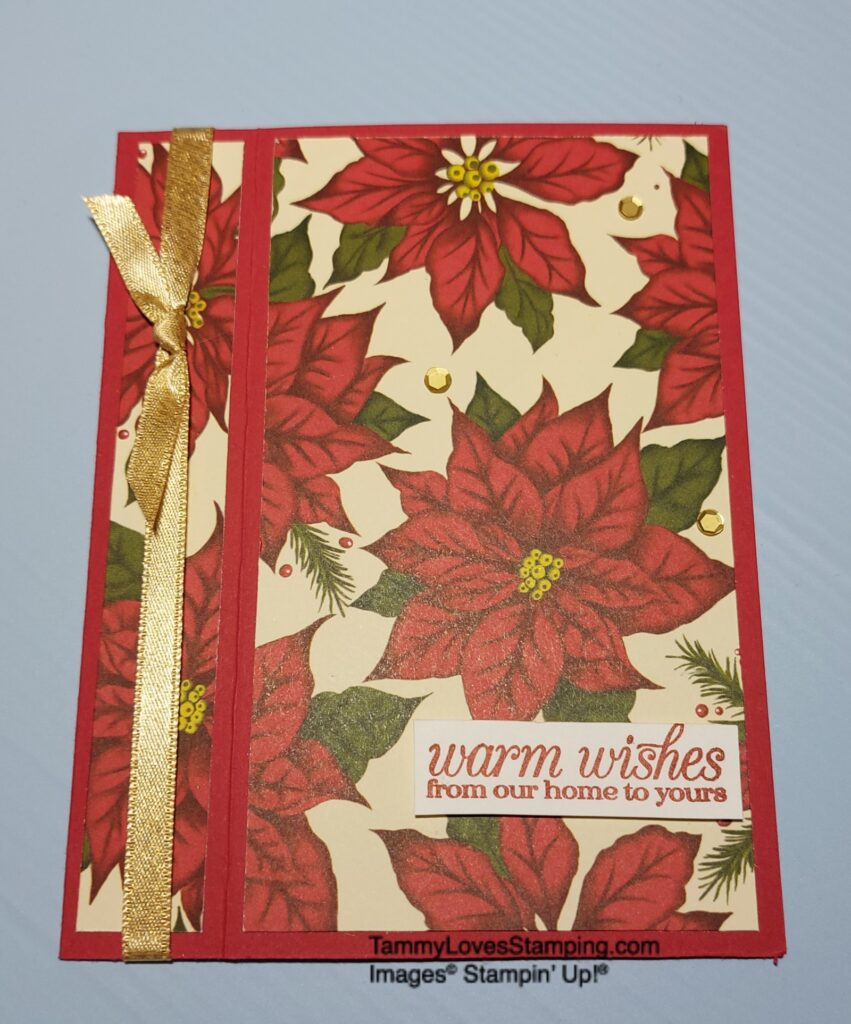
This fun fold makes your card open like a book with a binding. Today I am going to show you 5 different ways to make it, including how to make a gift card holder! Gather your supplies from the list below and follow along step by step.
Supplies for Book Binding Fun Fold Card #1 (Landscape)
Note: You don’t have to use the same colors or paper as me. Use whatever supplies you have on hand.
- green cardstock for the card base measuring 4-1/4″ x 11″
- designer series paper measuring 4″ x 4″ and 4″ x 1″
- white cardstock measuring 4″ x 4 ” (inside of card), scrap of white for the label
- adhesive (tape runner or liquid glue)
- red ribbon (approx 10″)
- embellishments
- red/green ink
- stamp set for your sentiment
- snips
Steps for Book Binding Card #1 (Landscape)
1. Score the card base along the 11 inch side at 4-1/4″ and 5-1/2″ and fold it in half at the 5 1/2 inch score line and fold the other score line back the other way as shown.
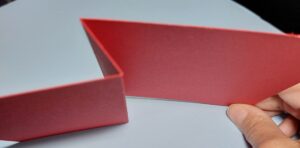
2. Attach your designer series paper to the front of the card base where the two score lines are. Put the 4 x 1 inch piece on the left of the 4 1/4 inch score line and the 4 x 4 inch piece of dsp to the right of the 4 1/4 inch score line.
3. Open your card and place your ribbon inside along the 5 1/2 inch score line leaving the same amount of ribbon above and below the card (see picture). Add liquid glue in between the two score lines and seal the binding shut with the ribbon inside.
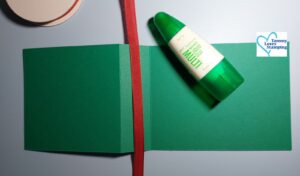
4. Add a piece of white 4″ x 4 ” cardstock inside the card for your sentiment and to sign it.
5. Tie your ribbon on the front of the card where the binding was just created.
6. Add your stamped sentiment and embellishments to finish decorating the card and don’t forget to decorate the envelope too! You can use non-Christmas patterned paper to make birthday or graduation gift card holder as well.
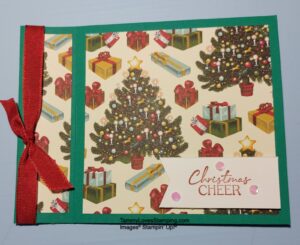
Steps for Book Binding Card #2 with a Gift Card Holder inside
1. Score the card base along the 11 inch side at 4-1/4″ and 5-1/2″ and fold it in half at the 5-1/2 inch score line. Then fold the other score line back in the other direction. (same as card #1)
2. Attach your designer series paper to the front of the card base where the two score lines are. Put the 4 x 1 inch piece on the left of the 4-1/4 inch score line and the 4 x 4 inch piece to the right of the 4-1/4 inch score line.
3. Open your card and put tear and tape adhesive at the top and the bottom only in between the two score lines leaving an opening in between for the gift card. Seal it shut. When you open the card there should be enough space to slide your gift card into the book binding. (see pictures below) Note: If you don’t need space for a gift card you can just adhere the entire section.
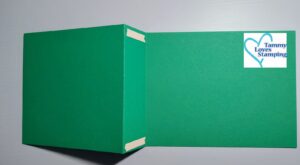
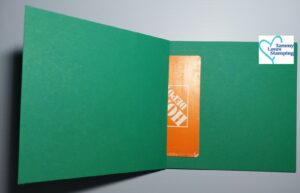
4. Wrap your red ribbon around the front flap of the card, just above the slot for the gift card and tie it in the front. Add a piece of white 4″ x 4 ” cardstock inside the card for your sentiment and to write a note.
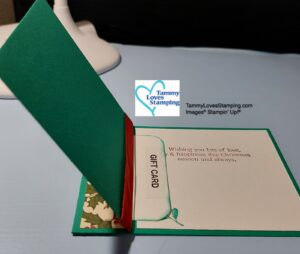
5, Add your stamped sentiment and embellishments to finish decorating the card. You can make birthday or holiday cards this way. Remember you can also decorate the envelope to match the card.
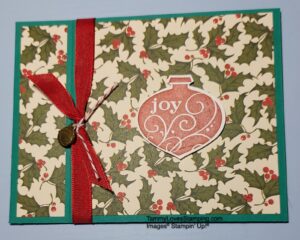
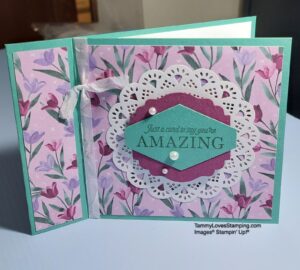
Steps for Book Binding Card #3 (Portrait)
Repeat the same steps as card #1 above except when you decorate you will turn the card to orient like a portrait and decorate it accordingly.
Note: If you use pattern paper that is directional, you will need to cut the pattern paper (dsp) so that the direction of the design is up and down rather than side to side.
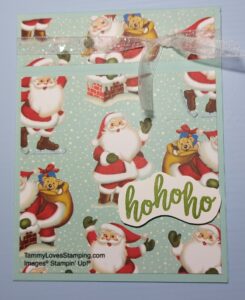
Steps for Book Binding Fun Fold Card #4 (Landscape)
Note: Cardstock and designer series pattern paper measurements are different than the three cards above.
1. Take a piece of cardstock measuring 5-1/2″ x 8-1/2″
2. Score the card base along the 8-1/2″ side at 4-1/4″ and 5-1/2″ and fold it in half at the 4-1/4″ inch score line and fold the other score line back the other direction.
3. Attach your designer series paper to the front of the card base where the two score lines are. Put the 5-1/4 x 1 inch piece above the 5-1/2 inch score line and the 5-1/4 x 2-3/4 inch piece of dsp below the 5-1/2 inch score line. If your patterned paper is directional, be sure you cut your paper accordingly so that the two pieces have the pattern going horizontal across the page.
4. Optional step: Open your card and place your ribbon inside between the two score lines leaving the same amount of ribbon above and below the card (enough to tie a knot or a bow).
5. Add liquid glue in between the two score lines and seal the binding shut with (or without) the ribbon inside.
6. Tie your ribbon and decorate the front of the card as desired.
7. Add a piece of white cardstock (2-3/4″ x 5-1/4″) inside the card.
You won’t have as much space to write or stamp a sentiment inside with these measurements as you do with the first 3 cards.
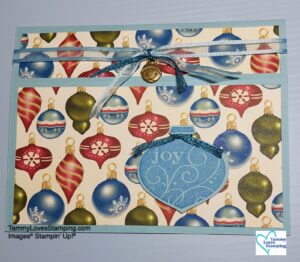
Steps for Book Binding Card #5 (Portrait)
Note: Cardstock and designer series pattern paper measurements are different than cards 1-3 above.
1. Take a piece of cardstock measuring 5-1/2″ x 8-1/2″
Repeat the same steps as card #4 above except you will turn the card to orient like a portrait and decorate it accordingly.
Note: If you use pattern paper that is directional, you will need to cut the pattern paper (dsp) so that the direction of the design is up and down rather than side to side.
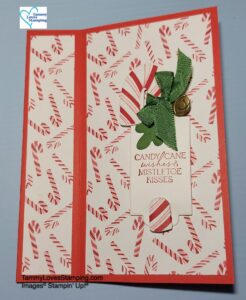
I hope you give the book binding fun fold a try. Let me know if anything in these instructions is unclear so I can update them. Email Tammy@tammylovesstamping.com
If you need any card making supplies, please head over to my online store by clicking this link to order.
Sign up for my newsletter to be the first to hear Stampin’ Up! news like sales, clearance items, new card kits and things like that. If you need a Stampin’ Up! catalog fill out the form and I will mail you one free of charge!
God bless you and keep on stamping!
Tammy
